Collecting boletes
When studying boletes, it is crucial to know how to collect, preserve and further deal with the collected material. This section tries to briefly explain the most important things one should know if planning to study this group of fungi. When reading the explanations below, it may seem that collecting and studying boletes is a laborious task. Yes, it is, but once the first collections are processed all the steps become a routine and are done with ease.
Download PDF version of this page
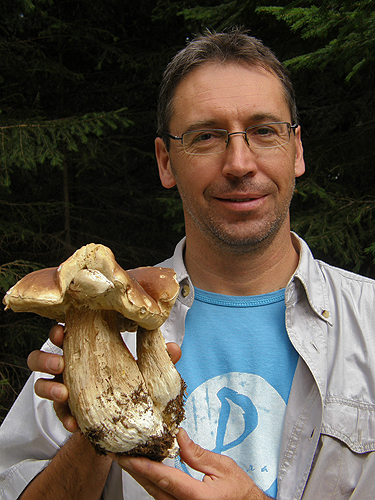
Collecting boletes
With very few exceptions most of the European boletes are mycorrhizal fungi, which means that they built a mutually beneficial relationship (symbiosis) with various trees and shrubs. Therefore the usual places where we see them are various woodlands and scrubland. Some of them are seen in different kinds of artificial tree plantations including parklands and even hedges or under single trees growing in open or along roads and streets.
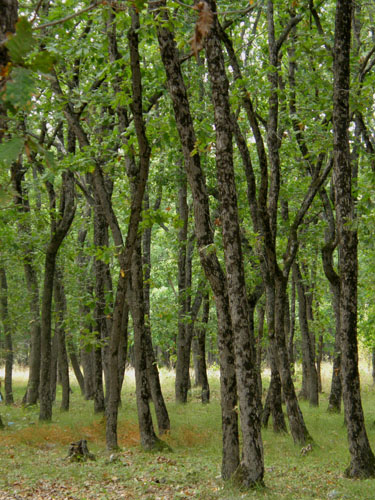
Warm oak woodlands are home for many rare boletes. (photo B. Assyov)
What to collect?
The perfect collection of boletes would contain few fruitbodies in different stages of development, as macroscopic characters of those fungi may vary significantly with age and even between different fruitbodies of the same age.
Every collection of boletes should be photographed when still in the field, preferably in daylight, as most characters used for the determination fade within few hours after collection. Many characters are completely lost after the fruitbodies are dried and a good photograph is essential when preparing herbarium specimen that is needed for further examination. A series of articles on illustrating and photographing fungi was printed in the journal Field Mycology and are available online. I will also strongly recommending reading the excellent review of Dimitar Bozhanchev explaining the top 10 mistakes in the mushroom photography and how to avoid them.
The good set of photographs of a bolete collection should show all the important macroscopic characters of the fungus. One should make sure that the photographs show the following things – colours of the cap on both the upper and the side, colours and any ornamentation (network, granules) of the stipe, colour of the flesh, which changes dramatically in some boleti.
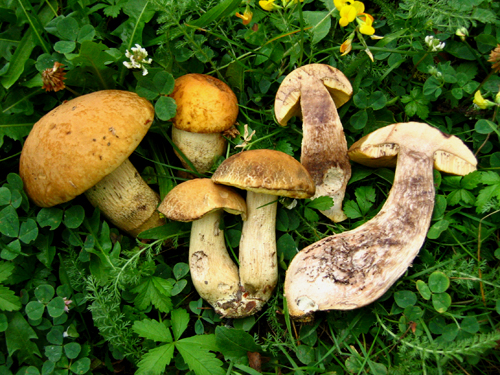
A good fotograph of fruitbodies of different age and showing different important characters. (photo B. Assyov)
In addition to the photographs, yet in the field one must note what trees and shrubs grow in the immediate vicinity, where the bolete fruitbodies were found. In most cases it would be extremely difficult to tell what the mycorrhizal host of the fungus is, but good notes may prove useful later, when you try to determine your collection. A simple illustrated guide to the common mycorrhizal hosts of boletes is available for download here. More sophisticated guides to trees and shrubs are available from our bookstore.
After photographs are taken, good care must be taken to transport the collections intact. Personally I prefer wrapping the fruitbodies separately in aluminum foil or waxed paper, but simple paper bags might also be used. Avoid putting boletes in plastic bags as just after half an hour they become soaked and further processing might appear difficult if not impossible.
After all collections are brought back home, they should be immediately processed. First of all every collection must be thoroughly described and then dried. If there is no possibility to process the collections within the same day, put them in cold place to overnight. If putting in refrigerator, make sure its temperature is set above zero, so the fungi don’t freeze as freezing damages the fruitbodies irreparably and further processing is nearly always impossible.
The description of the boletes intends to complement the photographs and the notes taken in the field. A good description will include the characteristics, listed below.
Colour of the cap. Colours are noted preferably in daylight and using standard colour chart if there is any available (for the different colour charts consult the literature section).
Colour changes when the cap is bruised.
Shape of the cap. Schemes are available in many field guides, but one may also use the simplified one provided here.
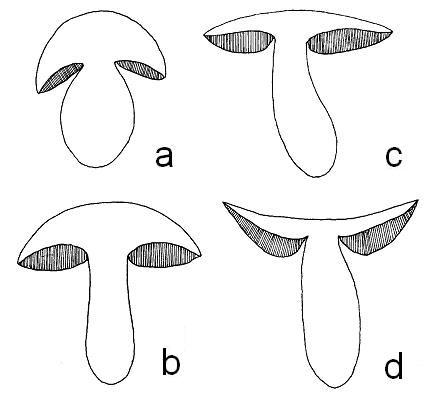
Shape of the cap: a - hemispherical, b - convex, c - almost flat, d - depressed. (drawing B. Assyov)
Cap cuticle – dry, velvety, cracked, viscid.
Cap margin – wavy, inrolled, appendiculate.
Colours of the stipe – use the colour chart.
Shape of the stipe. As for the cap, detailed schemes are available in most field guides, but the one below is acceptable.
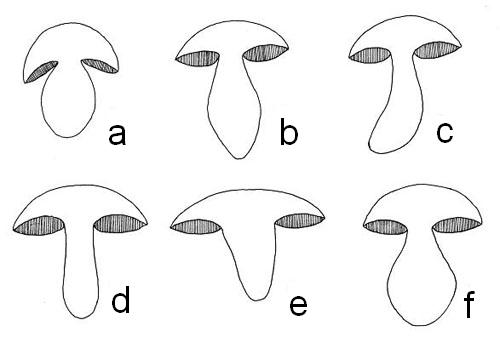
Shape of the stipe: a - ovoid, b - ventricose (swollen in the middle), c - club-shaped, d - cylindrical, e - obconical, f - bulbous (swollen at the base). (drawing B. Assyov)
Partial veil. The partial veil covers the hymenophore (the pores) of the young fruitbodies of many species of Suillus. In fully developed and old fruitbodies the veil is torn and parts of it remain as a ring attached to the stipe surface. Note that the ring may be difficultly visible, especially in old and dry fruitbodies.
Ornamentation of the stipe. Very important for the bolete determination, so do not miss to note. The stipe may be without ornamentation, covered by fine network or granules or with combination of network and granules. In all species of Leccinum there is a peculiar stipe ornamentation of squamules. Note the type of ornamentation and the colours of the elements.
Blueing of the stipe, when bruised.
Colour of the tubes and the pores (or the gills for the boletes with gills) and any colour changes that occur when these are damaged (cut or scratched).
Colour of the flesh. Note the colour in the cap and the stipe of the fruitbody. Do not miss to note any peculiar colour, e.g. below the cuticle and in the base of the stipe, and so on. Remove carefully the tubes and note the colour of the flesh below them – it might be important; Boletus luridus e.g. is distinguised by the reddish or orange coloured flesh below the tubes.
Blueing of the flesh (also caled context). When it occurs note its intensity. Also pay attention on the place where it is localized, it might be important; for example, B. satanas and B. rhodoxanthus may be distinguished by the localization of the blue reaction – in B. rhodoxanthus it is in the flesh of the cap, while the flesh in the stipe is not blueing and remains bright yellow. In B. satanas the flesh is blueing overall. Do bear in mind that in some xerocomoid boletes the flesh could show the blue reaction very slowly, sometimes within an hour often cutting. This is an important characteristic, so check it carefully.
Smell and taste of the flesh. Tasting of the flesh must be done with care, chewing a small piece of it and spitting it afterwards.
Spore print. Preparation of spore prints of boletes could be tricky sometimes as their fruitbodies often contain large amount of water. To prepare a spore print take a single cap removing the stipe. Put the cap with the tubes downwards on a sheet of white paper and cover with whatever available glass cover or jar. Within 12 to 24 hours enough spores will be released and the spore print is ready. Note its colour (preferably comparing to colour chart). Afterwards let the spore print dry for 24 to 48 hours and keep it carefully as it may be usefull later when carrying microscopic examination.
Preparing a dried specimen
The preparation of specimens of the boletes is very important as in most cases any finding should be documented, and moreover microscopic examination is always recommendable in order to confirm any determination achieved by the use of macroscopic characters. Dried specimen is called also by the latin word exiccatum (plural exiccata).
Personally I prefer to dry boletes in open air whenever possible. The fruitbodies are sliced and placed in open air to dry, which usually takes a couple of days. Slices should be around 0.5 thick. Unfortunately drying in sun is not always possible and therefore one should also consider drying in drier. Professional driers are not always available but the commercially available food driers usually give satisfying performance.
When preparing specimens, take good care not to mix collections of different species. Make sure you will also be able to match each specimen with its photographs and description. Once started keeping dried specimens, their number tends to grow uncontrollably, so it might be wise to start filling a database with photographs, specimens and field notes yet from the beginning.
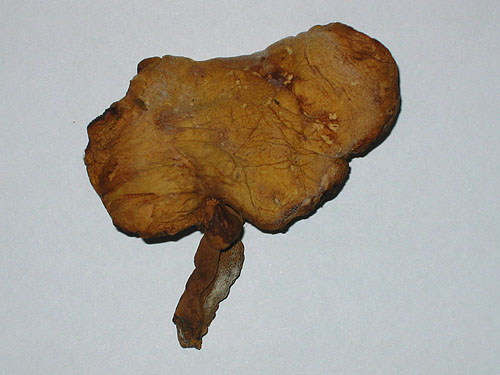
Dried specimen of Gyrodon lividus. (photo B. Assyov)
After fungi a satisfactorily dried, each specimen is kept in a separate paper bag, supplied with a label. Labeling is vital if you want to make your specimens really useful. The label must contain at least the following information:
Species (if known)
Place of collection (as detailed as possible, include any information available about the place, habitat, possible mycorhizal host, GPS-readings, etc.)
Names of the collector(s) and names of the person(s) who determined the fungus.
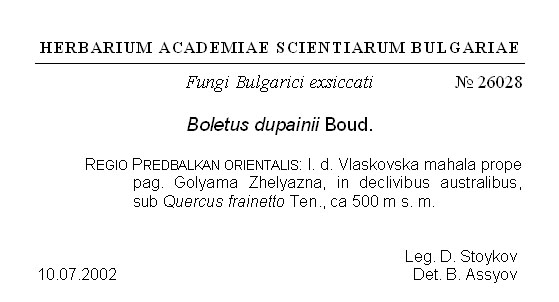
Sample of herbarium label. This one composed in Latin.
Once properly labeled, the specimens are kept in sheltered and dry place. Bolete specimens are favored food for many insects, so the samples should be regularly inspected for damages caused by pests. Even if there are no visible damages, all the specimens should be treated against insects at regular intervals of few months. Considering this amateur mycologist may find keeping mycological collection at home a bit inconvenient. One excellent way to solve this problem is to trust the specimens to be kept by public herbaria that have all the needed facilities for long-term keeping of exsiccata. If one chooses to deposit their collections in a public herbarium, they should consult a professional mycologist to point the closest public mycological collection in the area.